| ServiceComb微服务入门案例 | 您所在的位置:网站首页 › servicecomb 微服务 › ServiceComb微服务入门案例 |
ServiceComb微服务入门案例
|
今天给大家分享一个华为的ServiceComb框架写的微服务,过多的话不说了,直接上干货部分。 ServiceComb需要有cse的注册中心,这里介绍如何使用docker快速的搭建一个。 docker pull servicecomb/service-center docker run -d -p 30100:30100 servicecomb/service-center:latest
搭建成功后会在浏览器访问会有以上的输出,表明注册中心搭建成功。项目目录如下:
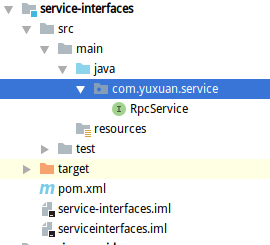
先来看看service-interfaces的部分
其中RpcService如下: package com.yuxuan.service; /** * */ public interface RpcService { public String sayRpc(String name); /** * 转成大写字母 * @param name * @return */ public String strToUpper(String name); }interfaces项目中只有这一个接口类,这个项目主要用来放置公共的部分。 下面我们来看provider项目,服务的提供者:
RpcProviderApp类如下: package com.yuxuan; import org.apache.servicecomb.springboot.starter.provider.EnableServiceComb; import org.springframework.boot.SpringApplication; import org.springframework.boot.autoconfigure.SpringBootApplication; @SpringBootApplication @EnableServiceComb public class RpcProviderApp { public static void main(String[] args) { SpringApplication.run(RpcProviderApp.class, args); } } RpcProviderServiceImpl如下: package com.yuxuan.provider; import com.yuxuan.service.RpcService; import org.apache.servicecomb.provider.pojo.RpcSchema; @RpcSchema(schemaId = "helloRpcSrv") public class RpcProviderServiceImpl implements RpcService { @Override public String sayRpc(String name) { return "name " + name; } @Override public String strToUpper(String name) { return name == null ? "" : name.toUpperCase(); } }application.properties 如下: server.port=9981microservice.yaml如下: APPLICATION_ID: start.servicecomb.io service_description: name: service-prvider-rpc version: 0.0.1 servicecomb: handler: chain: Provider: {} rest: address: 0.0.0.0:9080 service: registry: address: http://127.0.0.1:30100 autodiscovery: false #是否自动配置pom.xml配置: service-comb-t com.yuxuan 1.0-SNAPSHOT 4.0.0 service-provider org.hibernate hibernate-validator org.springframework.boot spring-boot-starter-data-rest org.springframework.boot spring-boot-starter-web org.apache.servicecomb spring-boot-starter-provider org.apache.servicecomb transport-highway org.apache.servicecomb provider-pojo com.yuxuan service-interfaces 1.0-SNAPSHOT下面我们来看 consumer 消费者项目:
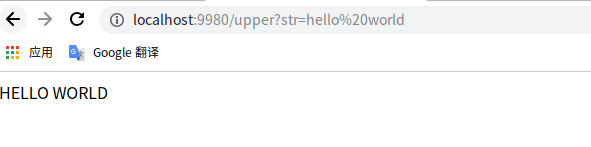
application.properties server.port=9980microservice.yaml APPLICATION_ID: start.servicecomb.io service_description: name: rpc-servicecomb-consumer-rpc version: 0.0.1 servicecomb: handler: chain: Provider: {} rest: address: 0.0.0.0:9081 service: registry: address: http://127.0.0.1:30100 autodiscovery: false #是否自动配置pom.xl service-comb-t com.yuxuan 1.0-SNAPSHOT 4.0.0 server-consumer UTF-8 UTF-8 1.8 org.hibernate hibernate-validator org.springframework.boot spring-boot-starter-data-rest org.springframework.boot spring-boot-starter-web org.apache.servicecomb spring-boot-starter-provider org.apache.servicecomb transport-highway org.apache.servicecomb provider-pojo com.yuxuan service-interfaces 1.0-SNAPSHOT至此consumer项目完了,下面我们看看父pom文件的配置 4.0.0 com.yuxuan service-comb-t pom 1.0-SNAPSHOT service-interfaces service-provider server-consumer UTF-8 UTF-8 1.8 org.springframework.boot spring-boot-starter-parent 2.1.2.RELEASE org.apache.servicecomb java-chassis-dependencies-springboot2 1.2.1 pom import org.springframework.boot spring-boot-maven-plugin接下来先运行 provider,在运行consumer,在浏览器中输入 地址进行访问,如图:
以上就是整个项目的配置了,有问题可以在评论区评论,技术问题可以私信我。 |


【本文地址】
公司简介
联系我们